If you’re currently testing an Android application, wish to learn more about your android device’s processes, review its event log or simply grab a screenshot of it to illustrate a problem or share your great widget or even an Android-Newbie – Motorola’s MotoDev Studio is the best place to start with.
Why should you consider trying MotoDev Studio? Various reasons:
- It installs most (if not all) Motorola’s Android device drivers and SDKs- thus if you’re using several devices there’s no need to install new drivers.
- It runs all Android Virtual devices – you may use it to learn, test & debug your application
- It allows quick access to LogCat stream & Device’s File Explorer
- It provides a detailed overview of your Android Emulator/Device’s Processes, Heaps & Threads
- Grab a screenshot of your Android Emulator/Device’s screen with a snap!
- A Comprehensive Android development environment
- It offers advanced diagnostic tools which can be used to detect memory leaks and test your applications before distribution.
Now follow these 14 simple steps to Install & Master MotoDev Studio on your way to become an Android Guru:
- Browse to http://developer.motorola.com/docstools/motodevstudio/ – Review this page to learn a bit about this amazing tool
- Click the ‘Free Download’ banner on top
- Under the top ‘Full installer: Includes Eclipse Environment’ download the matching installer to your system.
- Run installer and follow the on-screen instructions
- After MotoDev is installed successfully, locate the following directory:
<workspace>…metadata\.plugins\org.eclipse.ui.workbench
This folder will be found on different locations based on your operating system, E.g.
Windows XP:
C:\Documents and Settings\<user>\workspace\.metadata\.plugins\org.eclipse.ui.workbench
Windows 7:
C:\Users\<user>…\.metadata\.plugins\org.eclipse.ui.workbench - Copy the attached XML files to that directory and overwrite any existing files.
These files will set the environment workspace to the best configuration I created for ease of use and organized workbench.
Remark: Just rename the file below to rar and extract its content to the directory described above.
org.eclipse.ui.workbench.rar - Launch the MotoDev application:
- Get familiarize with the MotoDev Environment. Here’s an overview of the MotoDev Workbench – Make sure to review & learn it first. You can always review it later when needed.

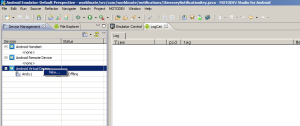
- Adding your first Android Emulator – Right click on the Android Virtual Device section on the left – Select ‘New’.

- ‘Create a New Device’ screen will open – Give your new emulator a name and hit the ‘Next’ button.

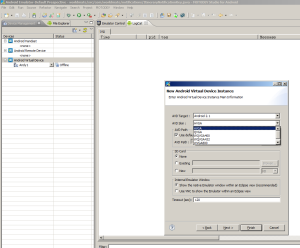
- Populate the AVD Target and select the desired Android Emulator target – e.g. HVGA, QVGA, WQVGA, etc.
Also and most important Add a new SD Card storage – without this you won’t be able to launch and use your Android virtual device. There is an option to add this SD card storage afterwards, however this is not always working, therefore make it an habit to create it upon creating a new virtual device.
For this just select ‘New’ under SD Card, type 20 in empty field and change storage type to MB – thus 20MB will be more than enough, unless your tested application is rather big.
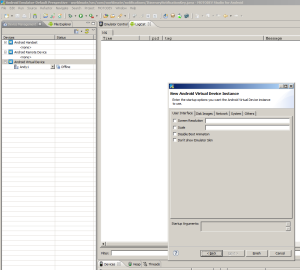
Now just hit the ‘Finish’ button to jump to the final screen. - This is the final stage – here you can setup various User interface option, Add/Edit Disk Images, Netwrok, System & Others options. You can pass these options for now and just hit ‘Finish’ button again to finalize the process and successfully create your first Android Virtual Device.

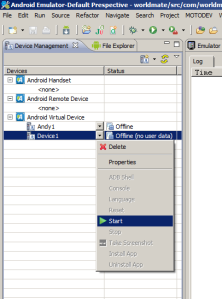
- Your first Android Virtual Device is now available for use –Just locate it under the devices section on the left, right click it and select ‘Run’.

- This is an overview of the MotoDev Environment when an Android Emulator is up and running. Available sections & features:
- Devices Selection/Overview & File Explorer – Lists connected handset, remote devices & device emulators
- LogCat stream in Real-Time – Analyze & debug your device/application with ease.
- Android Processes, Heaps & Threads
- Console, Progress & Emulator view sections
- Android Emulator screen & keyboard
- Grab a screenshot from your attached virtual or real device with a snap.
Now that you’ve learnt about MotoDev Studio, take it for a test drive and get familiar with its diversity of features and how you can utilize it to leverage your Android development & testing.
On my next blog post I’m going to cover various recommended Android tools, as well as additional logging & debugging tools for other mobile platforms (e.g. BlackBerry, iPhone,etc.). Feel free to bookmark it and drop by often as well as rate my posts and leave your comments here so I could learn more about my readers and which topics most appeal to them.
Happy Debugging & a great Thanksgiving to you all!
Bernard.


This i really good one. Thanks a lot for this impressive hard work.
Definitely it will be of grt help for newbies like me.
Cheers,
Sonal
By: Sonal on November 22, 2010
at 10:08 pm
Hi Sonal,
Thanks for your feedback! Feel free contacting me if you have further questions regarding this tool or testing & debugging android devices in general.
Cheers,
Bernard.
By: Bernard Lelchuk on November 28, 2010
at 6:04 pm
Good day I was luck to search your subject in bing
your post is superb
I obtain much in your Topics really thanks very much
btw the theme of you blog is really magnificentsuper
where can find it
By: bet365 on November 24, 2010
at 10:33 pm
Hi bet365,
Thanks for the warm feedback!
This is the theme I’m using: Ocean Mist by Ed Merritt
The sunset image is an original photo of mine which I think blends well with the colors of this theme.
Keep visiting my blog – there are more exciting posts to come! 🙂
Cheers,
Bernard.
By: Bernard Lelchuk on November 30, 2010
at 9:18 am
A good read out overall Bernard! I wish I had Android device in hand [not a virtual ONE] – yes I’m working hard to buy in next series or two.
Next up BlackBerry….huh? 😉
Best Regards,
Amit
By: Amit Kulkarni on November 28, 2010
at 5:28 pm
Thanks for the great feedback Amit! Blackberry is indeed next, unless you have any special request 🙂
Cheers,
Bernard.
By: Bernard Lelchuk on November 28, 2010
at 5:59 pm
BTW: Just a suggestion to give spaces between the steps/screen shots for better readability. [Its all up to you though]
Best Regards,
Amit
By: Amit Kulkarni on November 28, 2010
at 5:32 pm
Great suggestion – been applied on this post.
Let me know if I could improve readability even better. 🙂
Cheers,
Bernard.
By: Bernard Lelchuk on November 28, 2010
at 6:02 pm
good work. thanks!
By: Zularbine Kamal on December 8, 2010
at 9:37 pm
Thanks Zularbine Kamal,
Glad you liked this post.
I’d love to get your feedback on it after you’ve tried this.
Have a great weekend,
Bernard.
By: Bernard Lelchuk on December 11, 2010
at 7:31 am
Excellent way of describing, and nice paragraph to obtain data
about my presentation topic, which i am going to convey in university.
By: kate dircksen on May 9, 2013
at 1:37 am
Thank you Kate for your feedback!
What’s your presentation topic about? Please update me how it goes.
Cheers,
Bernard.
By: Bernard Lelchuk on May 9, 2013
at 8:15 am